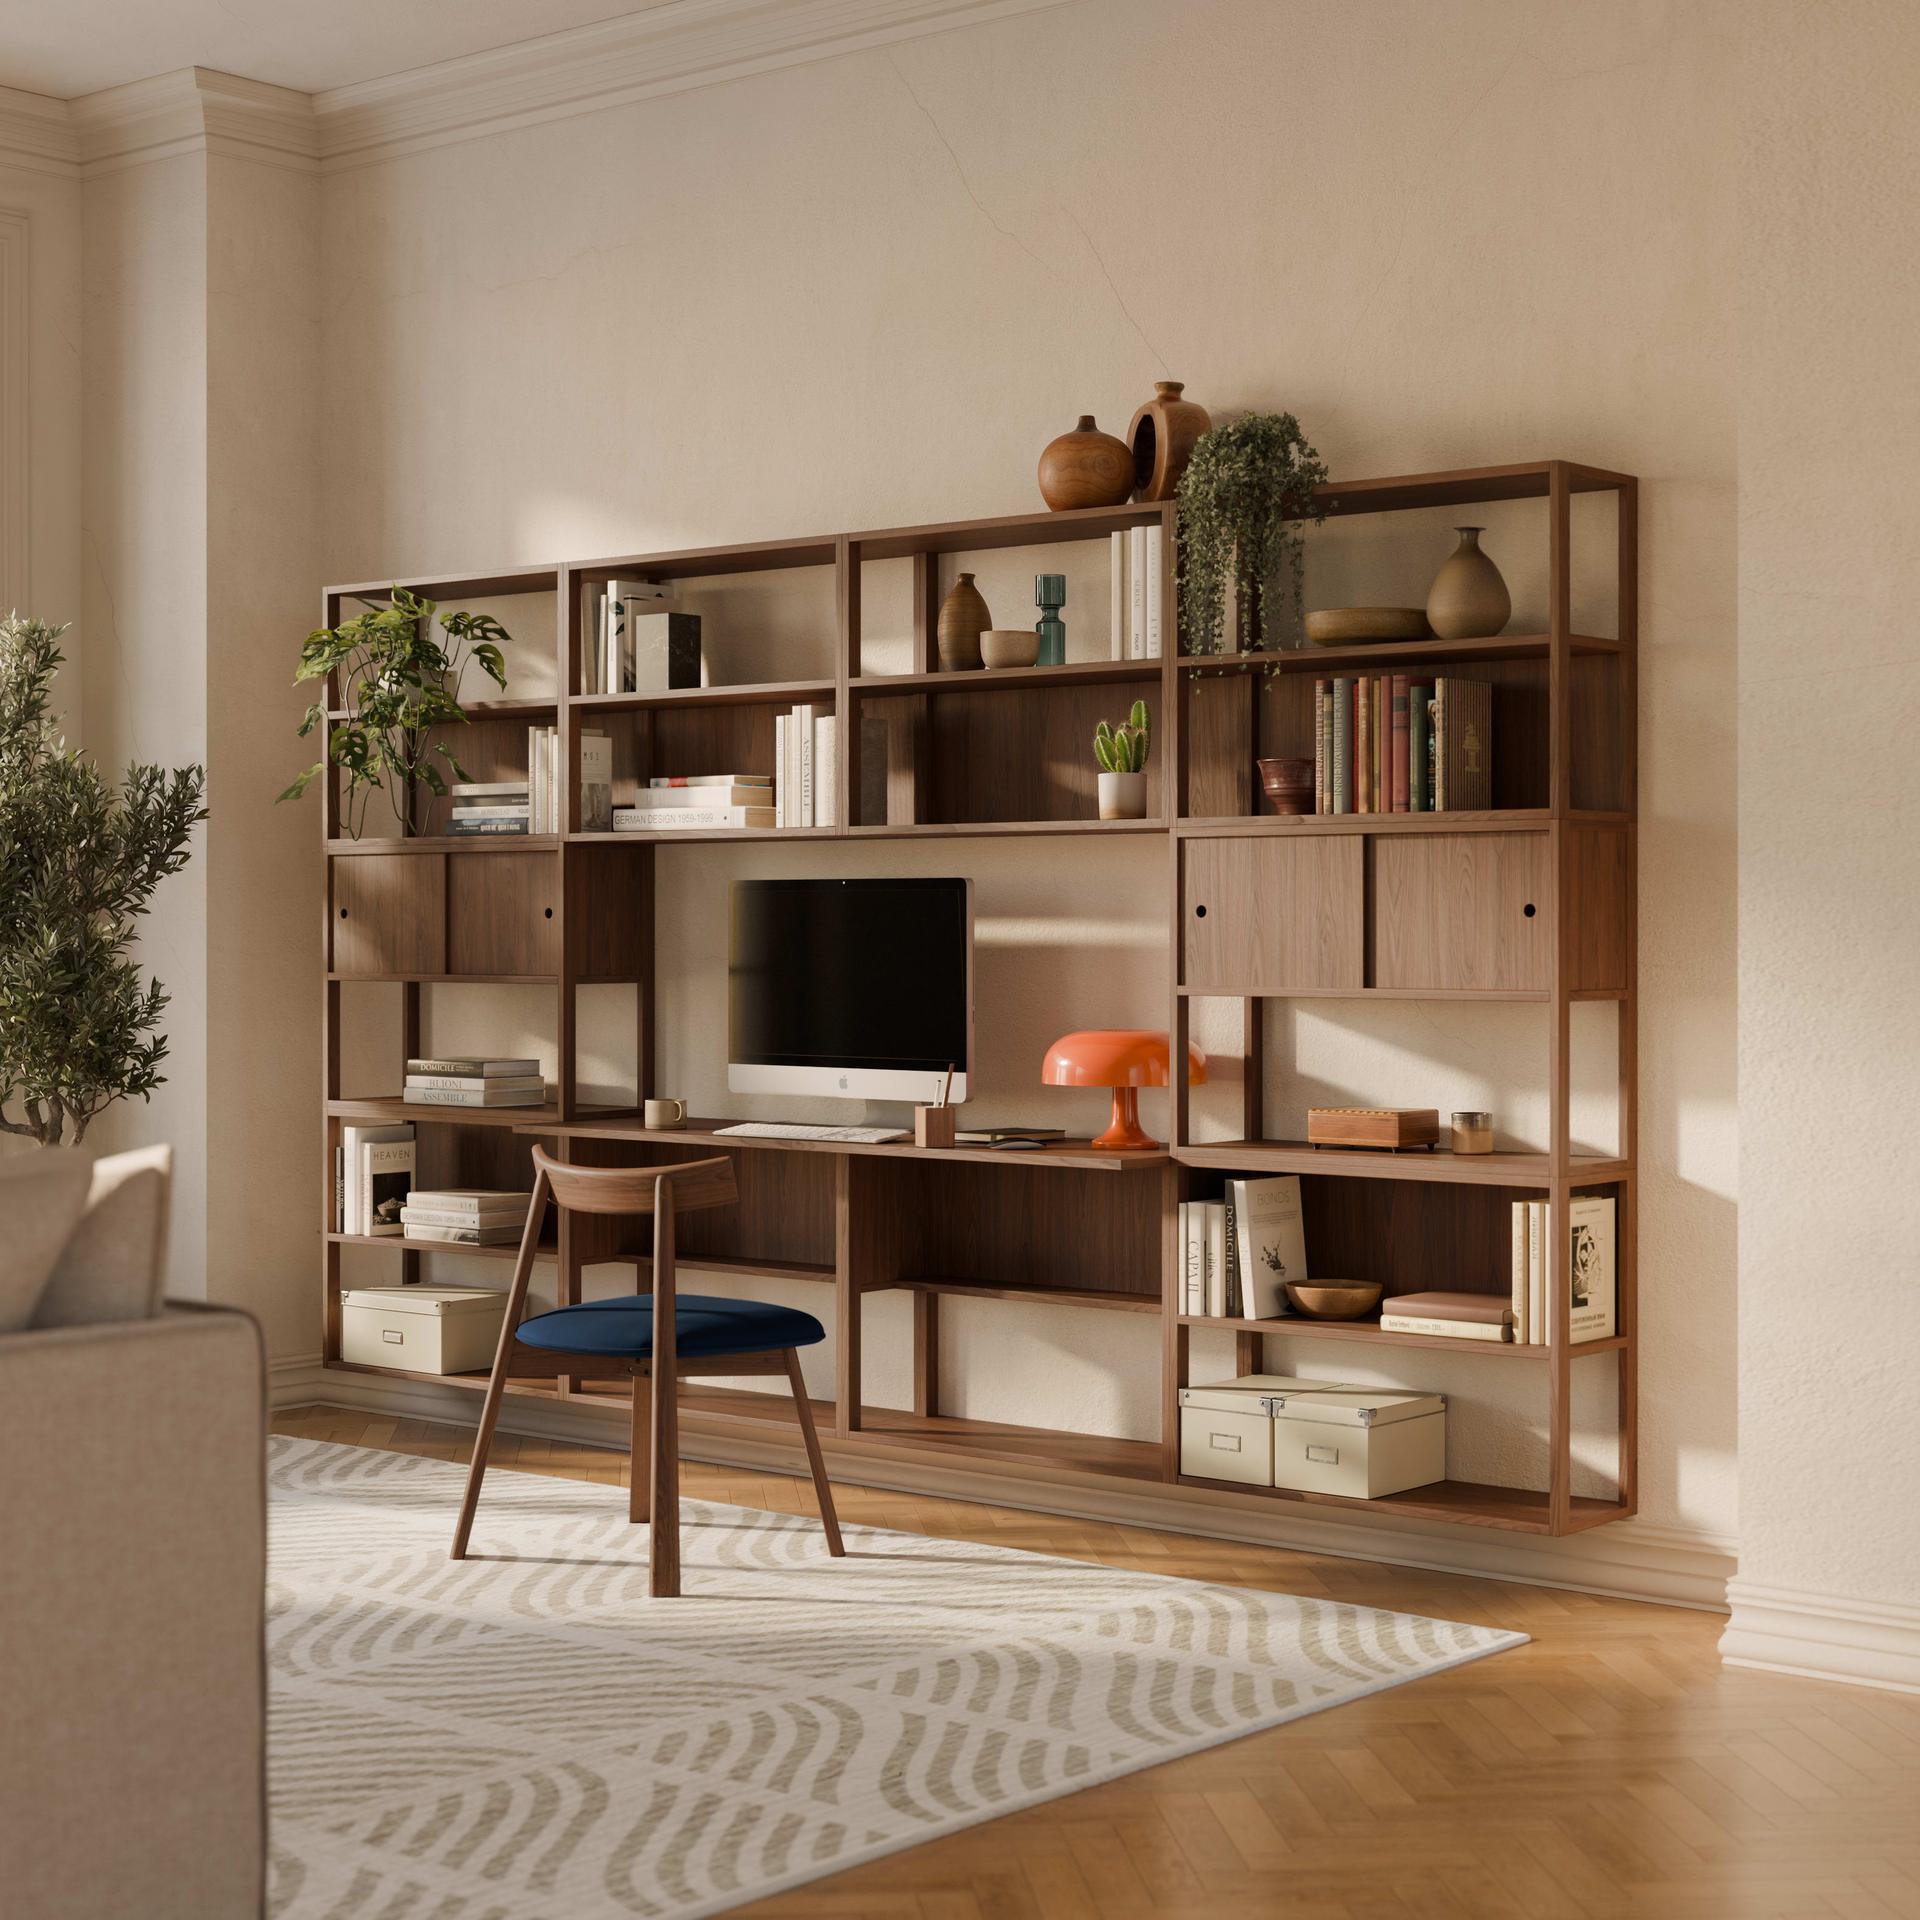
Short answer: Plan a shelving wall in six steps: measure the wall and the walkway in front of it, decide what must be hidden and what can be shown, choose wall-mounted or freestanding, pick depths and heights, mix open shelves with closed units, then fix everything to the wall. We make two modular systems for this, Themis and Altitude, and each Themis shelf, cabinet or desk holds 23 kg (50 lb).
A shelving wall combines width, depth, height, weight and fixings, so it is easy to get one of them wrong on paper. Working through the steps in order catches the problem before anything is drilled. Our living room storage guide covers what to store; this guide covers where it goes.
On This Page
- Step 1: measure the wall and the room
- Step 2: decide what the wall has to hold
- Step 3: choose wall-mounted or freestanding
- Step 4: choose depths and heights
- Step 5: mix open shelves and closed units
- Step 6: anchor the wall and stop the tipping
- What fits on each wall width?
- How do you plan storage for a small, open-plan living room?
- Our recommendation
- Explore our storage
Step 1: measure the wall and the room
Measure the width and height of the wall, then mark everything that interrupts it: outlets, switches, vents, window and door frames and baseboards. Sketch the wall on paper with those marks, so you can avoid a shelf that lands on an outlet.
Then measure the floor in front of it. As a general guideline, keep walking paths at least 76 cm (30 inches) wide, and 91 cm (36 inches) is more comfortable where people pass often. Subtract the depth of the unit from the floor space, and check that the walkway is still there. This is general advice, not a product specification. Our open-plan layout guide shows how a wall fits into the rest of the room.
Step 2: decide what the wall has to hold
Sort what you own into three groups before choosing a piece: things you want to see, things you want to hide, and things that are heavy. Books and objects suit open shelves. Cables, games, paperwork and media equipment suit doors. Heavy items, such as stacked books, need a unit with a published weight capacity and a spot low on the wall.
If the wall also has to be a workspace, our home-office corner guide shows how the Themis desk joins the shelves. If the goal is a calmer room, our guide to hiding clutter in a small living room covers closed storage.
Step 3: choose wall-mounted or freestanding
This choice decides the rest of the plan. Here is how our systems compare, using the sizes and capacities on the product pages.
Step 3: choose wall-mounted or freestanding
| System | Mounting | Depth | Weight capacity |
|---|---|---|---|
| Themis shelf and cabinet | Wall-mounted or freestanding | 28 cm (11.0 inches) | 23 kg (50 lb) per shelf, cabinet or desk |
| Themis desk | Wall-mounted only | 43.1 cm (17.0 inches) | 23 kg (50 lb) |
| Altitude shelf set | Wall-mounted | 24 cm (9.4 inches) | Not published on the product page |
Wall-mounting keeps the floor clear and lets you choose the height of each piece. Freestanding Themis units can change role if you move, but freestanding does not mean no fixings: the anti-tip hardware still attaches to the wall (see Step 6). The Themis desk cannot stand on the floor, so plan its wall first.
Step 4: choose depths and heights
Depth is the part you lose from the room. Our Altitude shelf is 24 cm (9.4 inches) deep, so it suits a narrow room. The Themis shelf and cabinet are 28 cm (11.0 inches) deep, and the Aurora credenza is 38 cm (15.0 inches) deep, which makes it the right base for a media wall.
For height, one Themis module is 61 cm (24.0 inches) tall and an Altitude shelf set of 1 is 81.3 cm (32.0 inches) tall. Our steel connector brackets join Themis units side by side or one above the other, so two stacked modules reach about 122 cm (48 inches) and three about 183 cm (72 inches). That is our arithmetic from the module height, not a published combined size. As general advice, put heavy items on the lowest shelves and stop short of the ceiling so the wall does not feel crowded.
Step 5: mix open shelves and closed units
A wall of only open shelves shows the cables and the cluttered corners, and a wall of only doors can feel heavy. Mixing both gives you somewhere to display and somewhere to hide.
- Themis: swap shelf and cabinet modules in the same 81.3 cm (32.0 inches) width. Each coloured door is reversible, and the yellow/white and green/white options are designed to be flipped during assembly.
- Altitude: add movable storage cabinets to a shelf set. The Altitude storage cabinet is 81.5 x 24 x 25 cm (32.1 x 9.4 x 9.8 inches) and its doors close with a magnetic push latch.
- Aurora: a low base for media. Its product page lists built-in ventilation and wire management, so equipment stays cool and cables stay tidy.
Our credenza and media unit guide helps you size the base for a screen.
Step 6: anchor the wall and stop the tipping
Fixings are part of the plan, not an afterthought.
- Wall-mounted pieces: Themis and Altitude boxes include wall anchors and anchor screws, and the shelf comes with a mounting poster or template. Hang the bottom units first and build upward.
- Freestanding Themis units: the box includes steel connector brackets to join units, anti-tip brackets that fix the unit to the wall, and felt pads for the floor. Plan freestanding units against a wall, because the anti-tip hardware needs one.
- Your wall: as general advice, find out what the wall is made of before you buy. Fixing into a stud is generally stronger than fixing into hollow drywall, and plaster or masonry may need different fixings, so ask a hardware store if you are unsure.
In an apartment or a rental, check the building or lease rules before you drill. Our guide to measuring stairs, lifts and doorways covers getting the flat-pack boxes to the room.
What fits on each wall width?
The table below is built from our published module sizes. Combined widths are our arithmetic (module width times the number of modules, with modules side by side), because we do not publish combined sizes.
What fits on each wall width?
| Wall width | What to put there | Depth from the wall |
|---|---|---|
| 81 cm (32 inches), a short section beside a door or window | One Themis shelf or cabinet, or one Altitude shelf set of 1 | 28 or 24 cm (11.0 or 9.4 inches) |
| 81 cm (32 inches) wide, tall ceiling | A stack of two or three Themis modules, 122 or 183 cm (48 or 72 inches) tall | 28 cm (11.0 inches) |
| 163 cm (64 inches) | Two Themis modules side by side, or an Altitude set of 2 placed side by side, or two Aurora units with a shelf set above | 24 to 38 cm (9.4 to 15.0 inches) |
| 244 cm (96 inches) | Three Themis modules, or a Themis desk, cabinet and shelf in a row, or three Aurora units with wall shelves above | 28 to 43.1 cm (11.0 to 17.0 inches) |
| 406 cm (160 inches) and wider | Five Themis modules, such as one desk, one cabinet and three shelves | 28 to 43.1 cm (11.0 to 17.0 inches) |
Before you order, tape the footprint on the wall and the floor. Product specifications can change, so confirm each size on the product page.
How do you plan storage for a small, open-plan living room?
In an open-plan room, one wall often has to serve the living area while the kitchen or dining table sits in view. Choose the shallowest system that holds what you own, such as Altitude at 24 cm (9.4 inches), so the walkway stays clear. Use doors on the lower half of the wall for anything you would not want to see from the kitchen, and keep open shelves for a few things you like. Our guide to storage for apartments and small spaces compares more pieces by footprint.
Our recommendation
- A narrow room or a small wall: Altitude shelf sets with one or two Altitude cabinets, at 24 cm (9.4 inches) deep.
- A wall that may change, or a desk and storage in one spot: Themis, wall-mounted or freestanding, with the desk wall-mounted.
- A media wall: an Aurora credenza as the base, with shelves above.
Explore our storage
Product specifications can change. Check the current dimensions on the product page before ordering.